Adding and Styling Text
Text boxes are one of the most common elements you'll add to a template. This page covers adding text, styling it, and reusing text snippets. See the Editor Overview if you haven't already toured the layout.
Adding a Text Box
-
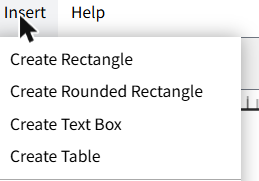
Open the Insert menu and choose Create Text Box.
-
Click and drag on the canvas to draw the text box at the size you want.
-
The text box appears with a blinking cursor, ready for typing.
-
Type your text.
-
Click outside the text box to finish editing and deselect it.
Styling Your Text
-
Double-click the text box to enter edit mode, then select the text you want to style (drag across it, or use Select → All Text from the menu to select every text element on the page at once).
-
Use the text formatting toolbar above the canvas to change the font, style, size, and alignment.

-
Click outside the text box to see your changes applied.
Positioning and Resizing a Text Box
-
Click the text box once (without double-clicking) to select it as an element, rather than editing its content.
-
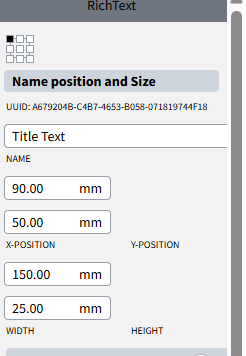
In the right panel's position and size section, adjust the X/Y position to move it, or the width and height fields to resize it precisely.
-
Alternatively, drag the box directly on the canvas to move it, or drag one of its corner handles to resize it.
Filling in Placeholder Text
If you want to see how a layout looks with a full paragraph before writing real copy:
-
Select an empty text box.
-
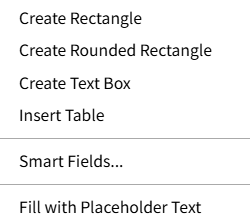
Open the Insert menu and choose Fill with Placeholder Text.
-
The box fills with dummy text so you can check spacing and sizing, then replace it with your real content when you're ready.
Reusing Text Snippets
-
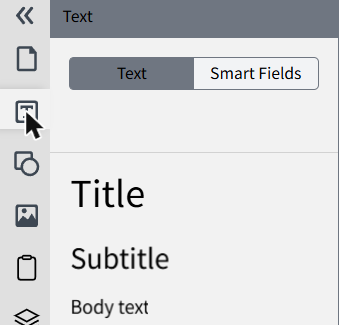
Open the Text tab in the left panel — this holds reusable text snippets rather than the current page's content.
-
Click a snippet to add it to the current page.
-
It appears as a normal text box on the canvas, ready to reposition and edit like any other.
Next Steps
Continue with Adding Shapes and Images.